Friday, December 30, 2011

Top projects of 2011

To go to the post click on the links.

#1. Hutch from two seperate pieces of furniture.

#2. Kitchen table refinish


 #3. Knock-off Ballard Cafe shelfs


 #4. Little Bench Refinnish


 #5. Boys Bathroom Wall Makeover


#6. I Built My Own Entry Table

And last but not least the top pick for 2011 is.....

wait for it..

wait for it....


#7. Sofa Table Tutorial

Okay so that's a recap off the top post for 2011! Thanks for all your kind comments and support.
-Lindsay

Tuesday, December 27, 2011

Happy New Year!

I hope all of you had a wonderful Christmas with your loved ones. Our Christmas was so fun, I just love the ages my kids are at. Christmas is SO magical for them and they were so cute on Christmas morning. I want my priority to be spending time with my family this week and I hope yours is the same. So until the New Year I will be out. Thanks for all the visitors and kind emails this year, I love all you comments and questions. I have "met" so many great people and I am excited to see what the new year brings. Thanks for all your support.

Lindsay

Friday, December 23, 2011

Free Botanical Printable Art

I got this printable art from http://honeyandfitz.blogspot.com/2011/07/free-botanical-art-prints.html#axzz1gC6aSDG2 via pinterest.com
You can down load ther botanical art and print it off to hang in your home. I have been looking for some just like this for ever. and it's FREE!!!!
Here are a few of mine I put up over my bed.

 I got these frames last week at Michaels for $4 each.  They are very simple.
I loved them above my bed so I put some more in my master Bathroom. I used my dollar store re do frames to put them in. They are quite a bit more detailed( too much going on) I think I like the more simple frame. But until I get to Michaels this is how they'll stay.


Not too bad for FREE! and the flowers make me think of spring! I know it's not even Christmas yet but a girl can dream right?

Wednesday, December 21, 2011

Twin Bed Makeover-sold!

-Here is a twin bed I bought about 6 months ago. I finally got around to painting it sage green.
 See here it is Sage green. It was cute but not what I was hoping for, so I painted it cream..
 Ahhhh so much better! The creamy white color is just so much better for a little girls bed. I even had this cute bedding to go on it. Too bad I have all boys. Oh well I will just have to sell it. Darn it I love how it turned out.

 I lightly distressed it, adding so much to the detail.

Monday, December 19, 2011

Swag..

I love this swag I saw on pinterest but I couldn't find any large bells so I used pinecones and round bells instead. Isn't the word SWAG wierd? Who made that one up? Any how the word is strange but the actual thing is cute!
                      DANG! This one is very cute I really need to get me some large glitter bells!
                                                             {trendytree.com}

Thursday, December 15, 2011

NOEL sign

I made this NOEL sign out of 1x6's cut them to about 6 1/2 inches long stained them and added cream letters with a stencil made from the cricut. then I used a hammer and some screws to bang up the wood.

I really think this will be my last christmas project.. oh wait I have one more. But then that's it. I swear.
Thanks for stopping by today!
Lindsay

Tuesday, December 13, 2011

Kids crafts

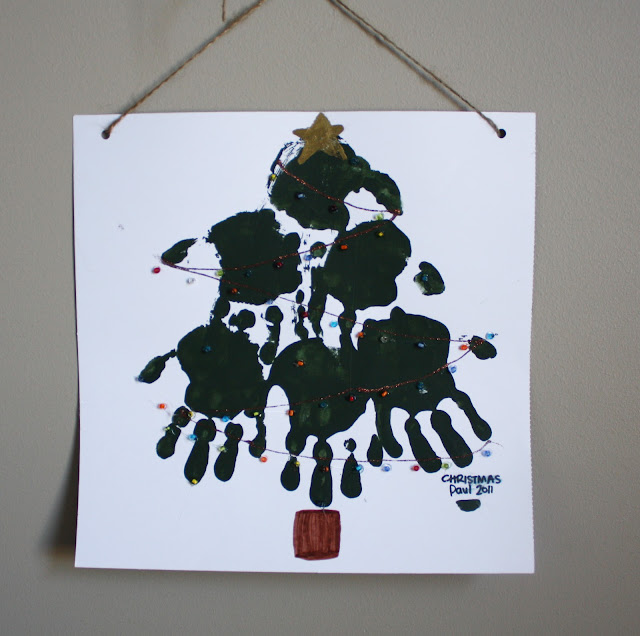
Tree hand print pictures. I saw something similar on pinterest but they did theirs on plates.

My boys loved doing these why because they got to get their hand all covered with green paint,such a boy thing to love to do.

 I found this air dry clay ot Joanns it was $5.99 for this bucket but I used a 50% off coupon, so it was super cheep. I have made a ton of things with this stuff. Here are a few things:

 This clay take about 24 hours to dry hard but my house gets really warm so it only takes ablout 12 hrs. The thicker you make them the stronger they will be (and the longer the drying time will be)

I love candy canes they totally say Christmas to me. I wanted some that you counldn't eat so I made some with clay they were super easy. Just roll out your clay in long stips cut in half and twist them together and roll on the counter so they stick together then form into a cane. Let dry over night and paint stripes red. SO EASY!


I used a straw to poke a hole for the twine to hang them with.
 I purchased these stamp letters at Joanne for $9.99 using a 50% off coupon and they work great to make your own saying on your tags.
 My kids wanted to make their own animals tags using their plastic toys to push into the clay as a mold. They turned out pretty cute. They will be painting them but we haven't got to it yet.


Sunday, December 11, 2011

Christmas Banners

I loved my halloween banner so much I had to make a Christmas one.. okay well two.
The first one is made of burlap and the second is made from Painters Drop Cloth.
 On the burlap one I lightly brushed on some white paint and then I used the Cricut to cut some letters and used them as a stencil. I didn't fill in the whole stencil because I wanted the letters to look worn. Added some white bells on the send and done. simple!
I usually deck out my entry but I just didn't have the time this year. So I went all naturalish.

 On this one I used a chunkier font and added glitter to the letters right after I painted them on.
So go with you bad self and make you a Holiday banner!
Lindsay

Wednesday, December 7, 2011

Christmas stockings and Nativity...


I wanted to make some stocking to put in my basement that matched the style of my tree and my red ones just didn't fit the bill. I made these three out of painters drop clothe, you can buy it at Lowes or Home Depot it's really inexpensive. I made my own pattern and sewed them up. Added some burlap and stained wood letters-for my three sons names. wrapped twine around the letters and added some buttons and greenery. easy peasy!

I have never had a place to put my Nativity and now I do. I didn't have a stable to put it in so I made a crate and stained it. TaDa!! a stable!

Merry Christmas and Happy decorating to you!
Lindsay

Monday, December 5, 2011

More Christmas

Okay here is my traditional Christmas decor that is in my upsatirs. sorry for the picture overload.
directly below is what is over my mantle (We used to have a tv there but I really wanted to get rid of it and have another place to decorate and so it's gone corner fireplaces take up so much room if I had the choice i would not have done it but i did so until I come up with a solution this is how it will stay). I also wanted to focus more on the reason for Christmas so I put one of my favorite pictures of the Savior.


Here is my railing..


My entry table. I love my grapevine trees I got a few months ago they light up the entry so much with the christmas lights on them.


and last the shelf in my kitchen I love the wood snowflakes I got them at Joanns for $1.

Ok that' it for the upstairs decor. Hope your having a great day. It is freezing here today it was like 4 degrees this morning, so needless to say I will be staying inside today.
Lindsay